INDEPENDENT DEALER
Perry, GA | (888) 563-5143
OUR BLOG
Dive into the world of DIY car care with our step-by-step guide on how to change your car's oil. Get ready to empower your engine! Synthetic Motorsports in Perry has all the deets!

Fed up with expensive oil change visits? Well, guess what? You can totally take matters into your own hands and become the master of your engine care routine. This guide is all about giving you the lowdown and steps on how to change your car's oil. And the best part? You'll save a lot of money and feel awesome knowing you've got your car running smoothly. Let's jump right in!

Fed up with expensive oil change visits? Well, guess what? You can totally take matters into your own hands and become the master of your engine care routine. This guide is all about giving you the lowdown and steps on how to change your car's oil. And the best part? You'll save a lot of money and feel awesome knowing you've got your car running smoothly. Let's jump right in!
Ready to unleash your ride's potential? AMSOIL Signature Series 0W-16 is the top-performing choice! Call Synthetic Motorsports in Perry at (888) 563-5143 for info on this and additional formulas. Also, remember you can complete your car care routine with AMSOIL's online store.
Why Change Your Oil?
Oil changes keep your engine running smoothly. Clean oil reduces friction between engine parts, preventing wear and tear. Not only does this prolong your engine's lifespan, but it also helps maintain fuel efficiency. Plus, doing it yourself translates to significant cost savings compared to shop visits!Safety First: Preparing for the Oil Change
Before getting started, prioritize safety:- Gear Up: Before diving in, grab some essential safety gear. Gloves protect your hands from hot oil, while safety glasses shield your eyes from any splashes. Sturdy footwear will keep you surefooted as you work under the hood.
- Oil Selection: Consult your trusty owner's manual to find the recommended oil type and weight. The manual will also point you toward the location of the oil filter.
- Tool Time: Now it's time to gather your tools. You'll need wrenches (a socket wrench set is ideal), an oil filter wrench, a drain pan to catch the used oil, a funnel, rags for wiping up spills, and, optionally, pliers.
Getting Under the Hood: Draining the Old Oil
Now that you're prepped let's get to the oil itself!- Park Smart: Find a level surface, engage the parking brake, and chock your wheels to prevent rolling.
- Warm Up (Optional): While warming the engine can help the oil flow more easily, it's not always necessary. Check your owner's manual for guidance on this step.
- Locate the Drain Plug and Dipstick: Pop the hood and locate the oil drain plug and dipstick. These are your oil change gateways!
- Catch It All: Place your drain pan securely under the drain plug to capture the used oil.
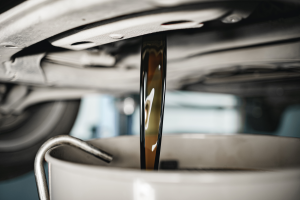
- Loosen Up: Using your wrench, carefully loosen the drain plug by turning it counterclockwise. Once loose, remove it by hand, wearing your gloves. Be prepared for a stream of used oil – that's why the drain pan is there!
Get the most out of your car with AMSOIL's high-performance synthetic oil now at Synthetic Motorsports in Perry! Dial (888) 563-5143 to make the smart choice for your car's engine. Top it off with a visit to AMSOIL's online store for all your car care needs!
Oil Filter Removal and Replacement
- Let it Drain Completely: Patience is key! Allow all the used oil to drain out before moving on. Remember, used oil shouldn't go down the drain – find a proper recycling facility.
- Filter Frenzy: The oil filter's location can vary depending on your car. It's usually cylindrical and screwed onto the engine block. Use your oil filter wrench or, if it allows, your hand to remove the old filter.
- Clean Sweep: Before installing the new filter, take a rag and wipe away any oil residue from the engine block where the new filter will sit.
Fresh Start: Installing the New Oil Filter and Oil
- Prime Time (Optional): Some mechanics recommend applying a thin coat of fresh oil to the new oil filter's gasket.
- Screw On, Don't Crank On: Thread the new filter on by hand until snug. Don't over-tighten it – a good hand-tightening is all it needs.
- Plug and Play: Clean the drain plug and screw it back in. Tighten it with the wrench following the torque specifications in your owner's manual.
- Add Oil: Locate the oil fill hole under the hood and use your funnel to add the recommended amount of fresh oil, as specified in your trusty owner's manual.
Checking the Oil Level and Finishing Up
- Dipstick Do's and Don'ts: Pull out the dipstick, wipe it clean, and re-insert it fully. Then, pull it out again to check the oil level. This is a crucial step!
- Top Up if Needed: If the oil level falls below the recommended range on the dipstick, add small quantities of oil at a time, checking the level after each addition.
- Final Touches: Wipe away any spilled oil and double-check for leaks around the drain plug and oil filter. A clean workspace is a happy workspace (and engine)!